Saturday, January 18, 2014
Tuesday, November 26, 2013
Decking and Dormers
Once the rafters were up, we were in a little bit of a race against the rain to get the roof on. You don't want your well built house to get all wet and end up with warped, moldy, rotten wood.
You may not have notice, but the roof to our cabin is very high and steep. This can make roofing a little tricky. So, we were thankful to have some help in this difficult stage. The night before Jimmy was supposed to start the decking (the wood that goes on top of the rafters and under the shingles) we got a phone message from our friends, the Moores, asking if they could come out to the next morning to help us build. When we got their message Jimmy heartily proclaimed "Thank you God!" and then quickly called them back to say "Yes, please come help!". Jimmy and Matt completed the "easy" side of the roof. That is, the side without windows in it.
Notice the wooden blocks nailed on top of the decking. Those are to prevent the ladders from sliding and my husband from falling to his death. Speaking of which, I need to brag a little. My husband claims that he is afraid of heights. And I believe him, because although I was thrilled to go cliff jumping on our honeymoon, the only thing that finally made him very shakily jump into the water was his pride and the 7 year old little girl that went before him. And unlike me, he sure didn't want to do it again. HOWEVER, as we have been working on this house, you wouldn't suspect his fear because he has been climbing all over things in all kinds of crazy positions with heavy materials and equipment way up high without letting it slow him down a bit. When we were putting up the rafters (in a strong wind) I was definitely nervous and shaking and he was acting like it was nothing. Just goes to show what a little bit of determination can do for you.
So, a few days after the Moore's help, Jimmy's brother Ben came back and helped him finish up the dormers (windows sticking out of the roof) and the decking on that side.
Some people might say that a construction place is no place for little children. We would reply that it is a great place for them to begin learning custodial skills :o) Abigail is our ever diligent cleaner.
You may not have notice, but the roof to our cabin is very high and steep. This can make roofing a little tricky. So, we were thankful to have some help in this difficult stage. The night before Jimmy was supposed to start the decking (the wood that goes on top of the rafters and under the shingles) we got a phone message from our friends, the Moores, asking if they could come out to the next morning to help us build. When we got their message Jimmy heartily proclaimed "Thank you God!" and then quickly called them back to say "Yes, please come help!". Jimmy and Matt completed the "easy" side of the roof. That is, the side without windows in it.
Notice the wooden blocks nailed on top of the decking. Those are to prevent the ladders from sliding and my husband from falling to his death. Speaking of which, I need to brag a little. My husband claims that he is afraid of heights. And I believe him, because although I was thrilled to go cliff jumping on our honeymoon, the only thing that finally made him very shakily jump into the water was his pride and the 7 year old little girl that went before him. And unlike me, he sure didn't want to do it again. HOWEVER, as we have been working on this house, you wouldn't suspect his fear because he has been climbing all over things in all kinds of crazy positions with heavy materials and equipment way up high without letting it slow him down a bit. When we were putting up the rafters (in a strong wind) I was definitely nervous and shaking and he was acting like it was nothing. Just goes to show what a little bit of determination can do for you.
So, a few days after the Moore's help, Jimmy's brother Ben came back and helped him finish up the dormers (windows sticking out of the roof) and the decking on that side.
Some people might say that a construction place is no place for little children. We would reply that it is a great place for them to begin learning custodial skills :o) Abigail is our ever diligent cleaner.
Saturday, November 23, 2013
Rafters and a Second Floor
Jimmy is a visual guy. He always has pictures in his head.
(This is a little strange to me because I am more of an audio person who always
has songs -never pictures- in their head, which of course is strange to him.) Anyways, Jimmy
has been dreaming of this cabin with a picture of it in his brain for many
years. The picture in his brain has always been of a cabin with a barn style
roof and loft. The original plan was to have a loft covering the back end of
the cabin with everything else open. However, being the practical dream spoiler
that I am, when I saw how large the "loft" was going to be and how
much empty space it left over the rest of the cabin I wondered aloud how
difficult it would be to just build a second floor and turn lots of
pretty, but wasted space into something useable. My wondering quickly turned into the end of Jimmy's dream of a cool
loft and the pretty picture in his head. (It is really tough to be a dreamer with a practical wife.) In order to construct the second floor we added crossbeams to the other half of the cabin before putting on
all of the rafters. It was really fun to watch the cabin develop through this stage. It was especially fun
to look out at the great view of the sky and lake through the open rafters on
the second floor.

Thursday, November 21, 2013
Interior Walls, Exterior Plywood, Crossbeams
![]() | |
A few weekends ago we were really thankful to have some good friends, the Beckers, come and visit for the weekend. Keith helped Jimmy get a lot done in just 2 days. First the 2 interior walls went up, then they enclosed the cabin by putting plywood on the exterior walls, then they put on half of the cross beams for the loft/second floor.
![]() |
| Keith cutting plywood for the exterior walls. |
Tuesday, November 19, 2013
A mock rafter, flooring, and walls
The first week of November was a little rainy and cold. Jimmy took the opportunity to work inside his Dad's shop and prep for his rafters. He was very proud of his first rafter raised on the ground floor, no matter that his wife made fun of him for putting up a rafter he was just going to take down. He had to see what it looked like.
Jimmy's brother Ben came to town to help him work on the cabin for a day. We were very thankful for his help. It took them back to the days of old when all 3 Burton brothers worked construction together. Ben helped Jimmy construct the rafters and put the floor down on top of the foundation.
Had to break in the new floor with a little bit of dancing. Abigail loved this.
Jimmy's wife helped him frame and put up the exterior walls. Here they go....
1 wall
2 walls
3 walls
4 walls
We had to do something with the girls while Mommy and Daddy were both working...
Saturday, November 16, 2013
October in Pictures
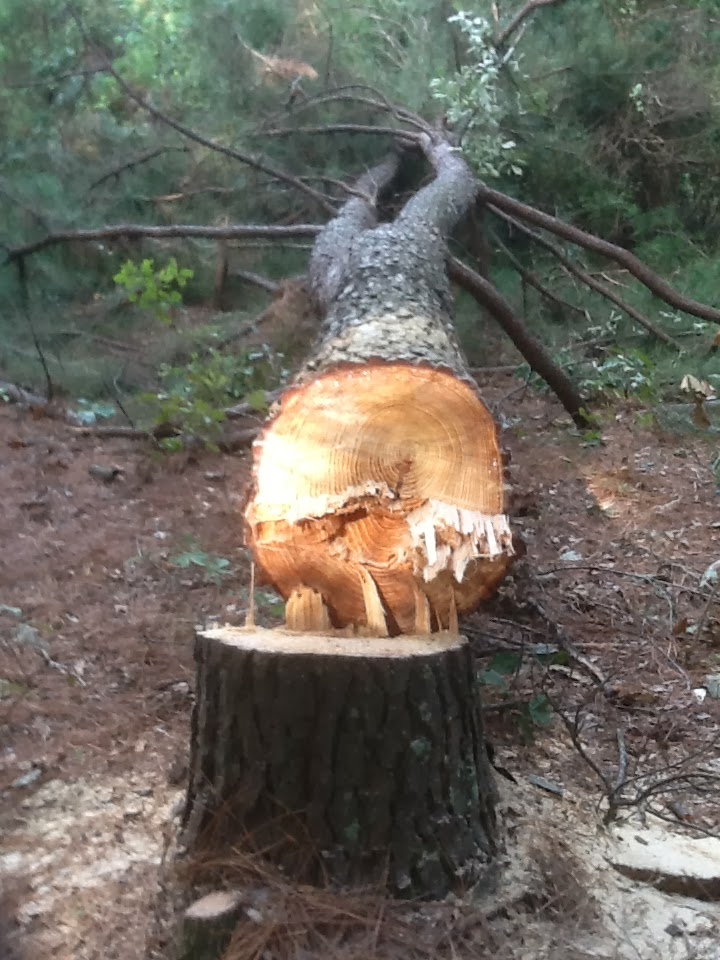
Jimmy's original hope was to actually cut down pine trees and mill them up into 2x4's, 2x6's, 2x10's, etc and use that wood to build the cabin. We spent some time the beginning of October attempting to locate pines that someone would led him cut down, cut them down, haul them, and cut them up. Here are pictures from one of the pines he cut. He worked very hard and cut down and up several trees, and learned a lot - however due to time constraints we were not able to get the wood we would need to frame the cabin this way. (We keep saying we'll have to do that for cabin number 2) Anyways, good thing there's always Home Depot.
Next came digging the 12 holes for the pier and beam foundation
Then running and leveling strings in order to build forms for the concrete. Unfortunately strings are somewhat inaccurate for leveling due to sagging. We found this out after pouring the first 3 forms. A hose filled with water (which finds its own level) is much more accurate. Thankfully we figured this out and were able to make adjustments before pouring the last 9 forms. After spending several days building these forms and getting them all leveled and in place Jimmy informed me that you can just buy this circular cardboard stuff that's made for concrete pier forms, but he doesn't like the "look" or cylindrical concrete piers, that's why he built his own rectangular ones. (Never mind that no one is going to be looking at the piers since they are UNDER the house!)
Between digging the holes and building and leveling the forms and getting ready to pour concrete it rained several times really hard. Guess who got to bail the water out of the holes for the piers - twice.
Then came the concrete - oh the concrete. My husband can be stubborn sometimes. Never mind that it would have been cheaper to have a concrete truck come pour the already mixed cement we needed into our holes for us. He decided to mix and pour all 100 bags of concrete himself- one wheelbarrow full at a time. (And when I say himself, I mean with the help of his loving wife who felt bad for him in the midst of his stubbornness.)
Once the piers were poured and dried it was time to lay the beams. In order to save money and do things differently Jimmy had come up with the idea of cutting up used railroad ties to make his beams out of. Good idea, only problem was railroad ties destroy the blades on a sawmill really fast. (They are also REALLY heavy). So after buying and hauling and attempting to cut up railroad ties, we were once again thankful for Home Depot and their supply of pressure treated wood.
| Abbi telling Daddy that he's the CHAMPION |
| Daddy agrees |
And that brings us to the end of October. One month down, a couple of good but failed ideas, a foundation built, the whole cabin left to go.
Subscribe to:
Posts (Atom)
.jpg)
.jpg)
.jpg)
.jpg)
.jpg)
.jpg)


.jpg)
.jpg)
.jpg)
.jpg)